Flutter 音声認識 (speech_to_text)
音声認識パッケージの利用
Flutterアプリの音声認識を実装していきます。Flutterは、様々な機能がパッケージの形で利用可能になっています。従って、実装すると言っても、提供されているパッケージを組み込むだけです。
パッケージの検索
パッケージは、以下のサイトから探します。
音声認識は「Speech to Text」なので、このワードで検索をしてみます。
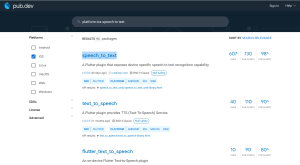
いくつか候補が表示されましたが、今回は、一番上の「speech_to_text」を選択します。
パッケージのインストール
それでは、パッケージをインストールします。パッケージのインストールは "flutter pub add <パッケージ名> " です。ターミナルから以下のコマンドを実行します。
flutter pub add speech_to_textインストールされると、 pubspec.yaml ファイルに以下の記述が追加されます。
speech_to_text: ^5.5.0コードでimport文を挿入することで音声認識が使えるようになります。
import 'package:speech_to_text/speech_to_text.dart';speech_to_textの使い方
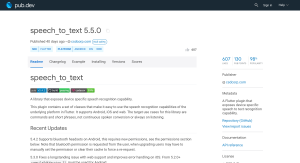
実際の使い方やサンプルコードが、各パッケージのページに記載されています。speech_to_textは、こちらのページを確認していきます。
Readmeには、OSによる挙動に違いや注意点も記載されています。必ず確認するようにしましょう。
この音声認識パッケージでは、端末のマイクと音声認識を使います。iOSの場合、マイクや音声認識を使う場合にはユーザ権限が必要です。このため、このパッケージを使う場合には、info.plistに以下のキーを追加します。
Info.plistファイルは、ios/Runnerフォルダにあります。
<key>NSSpeechRecognitionUsageDescription</key>
<string>”アプリが音声認識を使用する理由”</string>
<key>NSMicrophoneUsageDescription</key>
<string>”アプリがマイクにアクセスする理由”</string>
Readmeに、Complete Flutter exampleがありましたので、Demoアプリのmain.dartと置き換えて実行します。
import 'package:flutter/material.dart';
import 'package:speech_to_text/speech_recognition_result.dart';
import 'package:speech_to_text/speech_to_text.dart';

void main() {
  runApp(MyApp());
}

class MyApp extends StatelessWidget {
  @override
  Widget build(BuildContext context) {
    return MaterialApp(
      title: 'Flutter Demo',
      home: MyHomePage(),
    );
  }
}

class MyHomePage extends StatefulWidget {
  MyHomePage({Key? key}) : super(key: key);

  @override
  _MyHomePageState createState() => _MyHomePageState();
}

class _MyHomePageState extends State<MyHomePage> {
  SpeechToText _speechToText = SpeechToText();
  bool _speechEnabled = false;
  String _lastWords = '';

  @override
  void initState() {
    super.initState();
    _initSpeech();
  }

  /// This has to happen only once per app
  void _initSpeech() async {
    _speechEnabled = await _speechToText.initialize();
    setState(() {});
  }

  /// Each time to start a speech recognition session
  void _startListening() async {
    await _speechToText.listen(onResult: _onSpeechResult);
    setState(() {});
  }

  /// Manually stop the active speech recognition session
  /// Note that there are also timeouts that each platform enforces
  /// and the SpeechToText plugin supports setting timeouts on the
  /// listen method.
  void _stopListening() async {
    await _speechToText.stop();
    setState(() {});
  }

  /// This is the callback that the SpeechToText plugin calls when
  /// the platform returns recognized words.
  void _onSpeechResult(SpeechRecognitionResult result) {
    setState(() {
      _lastWords = result.recognizedWords;
    });
  }

  @override
  Widget build(BuildContext context) {
    return Scaffold(
      appBar: AppBar(
        title: Text('Speech Demo'),
      ),
      body: Center(
        child: Column(
          mainAxisAlignment: MainAxisAlignment.center,
          children: <Widget>[
            Container(
              padding: EdgeInsets.all(16),
              child: Text(
                'Recognized words:',
                style: TextStyle(fontSize: 20.0),
              ),
            ),
            Expanded(
              child: Container(
                padding: EdgeInsets.all(16),
                child: Text(
                  // If listening is active show the recognized words
                  _speechToText.isListening
                      ? '$_lastWords'
                      // If listening isn't active but could be tell the user
                      // how to start it, otherwise indicate that speech
                      // recognition is not yet ready or not supported on
                      // the target device
                      : _speechEnabled
                          ? 'Tap the microphone to start listening...'
                          : 'Speech not available',
                ),
              ),
            ),
          ],
        ),
      ),
      floatingActionButton: FloatingActionButton(
        onPressed:
            // If not yet listening for speech start, otherwise stop
            _speechToText.isNotListening ? _startListening : _stopListening,
        tooltip: 'Listen',
        child: Icon(_speechToText.isNotListening ? Icons.mic_off : Icons.mic),
      ),
    );
  }
}
デバッガを使って実行してみると、音声がリアルタイムで認識され、認識結果が画面に表示されるのが確認できました。
iOSのシミュレータでは、マイクが使えません。iOS端末を接続してデバックすることが必要です。
(追記)
webアプリでの音声認識、GoogleのCloud speech-to-Text APIを用いた音声認識に関して、以下の記事を追加しました。
Flutter 音声認識 (Web Speech API/Google Speech)
以前、音声チャットボットアプリを作るために、「Flutter 音声認識」の記事を書きました。 とりあえず、実装はできましたが、Web SpeechAPI,、google_speech(Google Cloud…